
Free and Easy-to-install SSL Certificate
Overview
Starting with version 9.20, TS2log provides an easy to use tool to generate of a free and valid SSL certificate.
In 3 mouse clicks you will get a secured valid certificate, renewed and configured automatically into TS2log built-in web server.
This feature uses Let's Encrypt to provide a free and secure SSL certificate for your HTTPS connections.
A SSL certificate is a data file that binds a cryptographic key to the information of an organisation or an individual. Installed on a server, the certificate enables the padlock and the "https" protocol (via port 443) in browsers. This ensured a secured connexion between the web server and the browser.
SSL (Secure Socket Layer) technology is used to secure data transmission on the internet: it encrypts and protects the data transmitted by using the "HTTPS" protocol.
SSL guarantees visitors of your website that their data will not be fraudulently intercepted.
SSL is used to secure banking transactions, data transfer and login information as usernames and passwords.
Prerequisites
Please ensure that your TS2log server meets these requirements before using the Free Certificate Manager:
You must use TS2log built-in web server listening on port 80 for HTTP. This is required by Let's Encrypt domain ownership validation process.
Your server's domain name must be accessible from the public Internet. This is required as well to validate that you are the real owner of the domain.
You must run this program on the Gateway server or a Standalone server, not an Application server (except if your Application Server is accessible from the public Internet and has a public domain name).
It is not possible to get a certificate for an IP address, be it public or private.
It is not possible to get a certificate for an internal domain name (i.e. a domain which only resolves inside your private network).
Free Certificate Manager GUI
To open TS2log Free Certificate Manager GUI, open TS2log AdminTool, click on the "Security" tab, then click on "Generate a free valid SSL certificate" as shown in the screenshot below:

The Free Certificate Manager GUI will open and remind you about the prerequisites, as shown in the screenshot below:

Please read carefully and check that your server meet all the requirements, then click on the "Next" button.
Step 1: Enter your Email
As shown in the screenshot below, you only need to enter a valid email address.
This email will not be used to spam you. Actually it will not even be sent to TS2log or any third party, except the certificate issuer: Let's Encrypt.
They will only contact you if needed, according to their Terms Of Service.
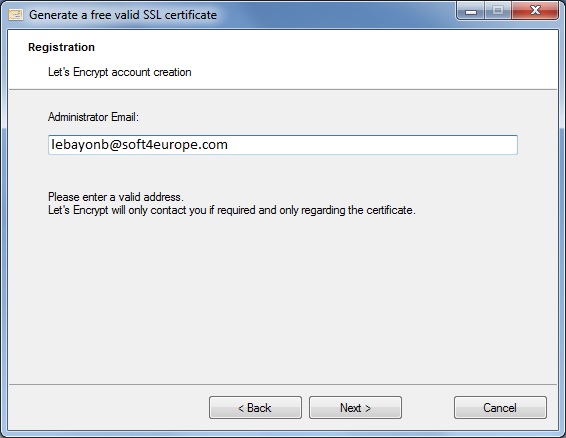
Enter a valid email, then click on the "Next" button.
Step 2: Accept the Terms Of Service
As shown in the screenshot below, you will be able to open Let's Encrypt Terms Of Service by clicking on the big button.
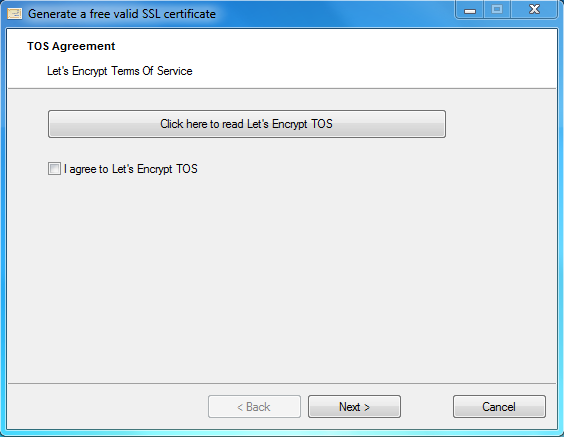
To accept these Terms Of Service and continue, check the checkbox and click on the "Next" button.
Step 3: Enter the server's Domain Name
As shown in the screenshot below, you only need to enter your server's public domain name.
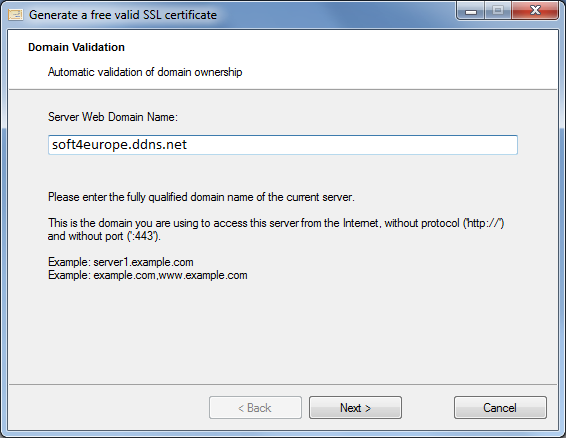
This is the public Internet accessible Domain Name, something like gateway.your-company.com.
As explained in the GUI Manager, do not add a protocol prefix and/or a port suffix, just enter the clean domain name(s).
The certificate will be generated for this domain name, and it will only be valid on a web page hosted at this domain name. If your users connect to your Web Portal using https://server1.example.com:1234, then you must enter "server1.example.com".
Enjoy your Certificate!
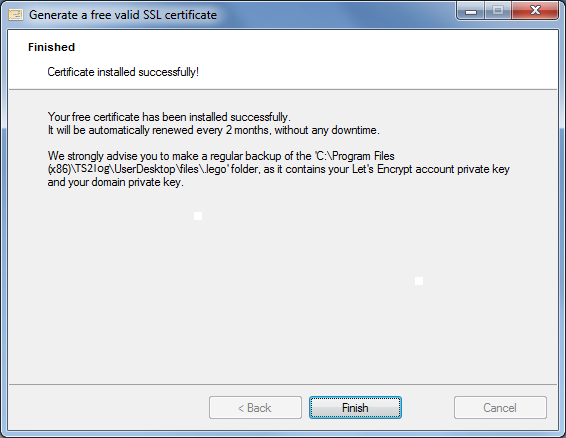
TS2log Free Certificate Manager will now use all the data to connect with Let's Encrypt, validate that you really own the domain name you typed, and get the matching valid certificate.
Once the program receives the certificate, it will automatically handle all the required file format conversions and reload TS2log web server in order to apply the new certificate to every new connection. The web server is not restarted and no connection is stopped.
Certificate Renewal
Let's Encrypt certificates are valid for 90 days.
TS2log will automatically renew the certificate every 60 days for safety. A check is done at every reboot of the Windows server, and then every 24 hours.
You can manually renew your certificate by opening the Free Certificate Manager tool. It will display the domain name of the certificate and its expiration date, as shown in the screenshot below.
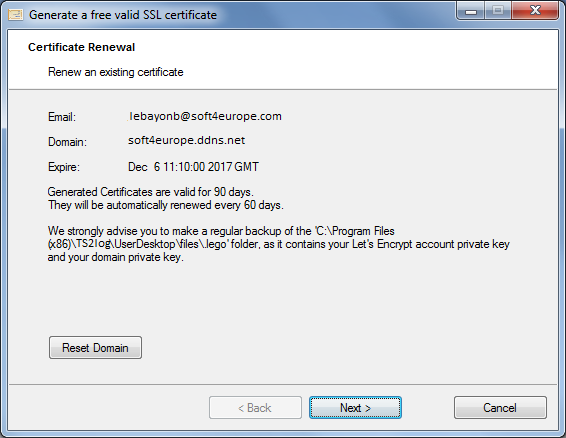
To manually renew your certificate, just click on the "Next" button.
Best Practices
If no error occurs, TS2log will renew the certificate automatically every 60 days. We recommend that you check every 60-70 days that your certificate has been automatically renewed.
We also recommend that you backup at least every month the following folder and its sub-folders:
C:\Program Files (x86)\TS2log\UserDesktop\files\.lego
This is an internal folder, containing your Let's Encrypt account private key, as well as the key pair of your certificate.
Troubleshooting
In case of an error, please contact support and email them the following log file:
C:\Program Files (x86)\TS2log\UserDesktop\files\.lego\logs\cli.log
This log file (and maybe the other log files in the same folder) should help our support team to better understand the issue.
If you want to restore a previously used certificate, go to the folder:
C:\Program Files (x86)\TS2log\Clients\webserverIt will contain every "cert.jks" files used. These are the "key store" files and we never delete them, we only rename them with the date and time of their disabling.
Error Codes
Error 801: Free Certificate Manager was not able to register your Let's Encrypt account. Check your Internet connection. Check that your email is not already registered at Let's Encrypt. Try again with another email.
Error 802 & Error 803: Free Certificate Manager could not retrieve Let's Encrypt Terms Of Service URL address. This is a non blocking error: you can still continue and accept Let's Encrypt Terms Of Service - be sure to read them from your browser first of course.
Error 804: Free Certificate Manager was not able to validate your agreement to Let's Encrypt Terms Of Service with Let's Encrypt servers. Check you Internet connection. Try again.
Error 805 & Error 806: Free Certificate Manager was not able to validate that you own the domain you entered during certificate creation (Error 805) or certificate renewal (Error 806). Check again all the prerequisites. Check your Internet connection. Check that your web server is listening on port 80. Check that you do not use a third-party web server such as IIS or Apache on the same port. Check that your domain name is accessible from the public Internet.