Activating Double-Factor Authentication
You can integrate the Double-Factor Authentication for TS2log with SAASPASS, the Leader of Multi-Factor Authentication.
The SAASPASS-TS2log integration is a quick and straightforward process. Before you start, please make sure that your server is accessible from out of your network. If your server cannot be accessed by SAASPASS you will not be able to use Scan Barcode, Proximity Login and One-Time Password to log in. The SAASPASS-TS2log integration can be done by following these steps (these instructions may be different on some Windows Server versions).
Prerequisites
Make sure you meet the pre-requisites before continuing the integration :
- Installed latest version of TS2log.
- Installed the SAASPASS mobile application or Desktop client.
- Company registration for SAASPASS from the admin portal at www.saaspass.com.
- Reachable server from SAASPASS for Login options as Scan Barcode and Proximity.
- SAASPASS is reachable from the server.
- Installed IIS with the following modules: CGI, ISAPI Extensions and ISAPI Filters.

- WebSocket Protocol and ASP.NET 4.5 installed on the server.
STEP 1
Download SAASPASS-TS2log plugin archive from here and extract the content into C://inetpub/wwwroot/SAASPASS-TS2log:

- Give full permission to the group "Everyone" in the directory "C:\inetpub\wwwroot".
STEP 2
Open IIS Manager, right-click on Sites and then click on Add Web Site. Fill the form with appropriate data, where the Physical Path will point to the extracted content of the archive.
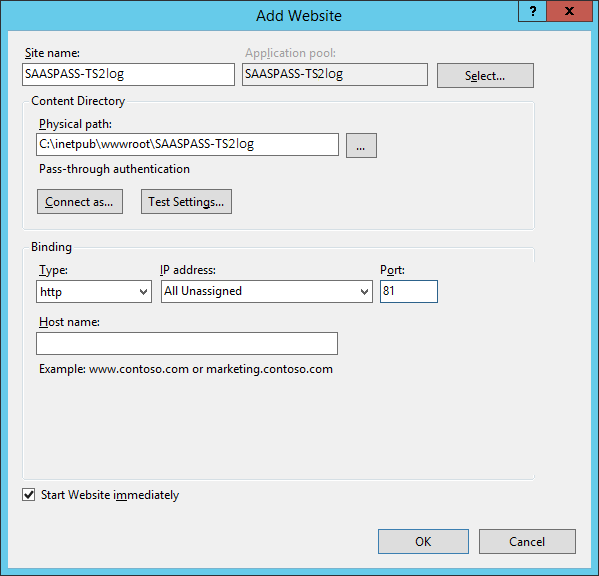
Don’t forget to specify the http port to 81.
STEP 3
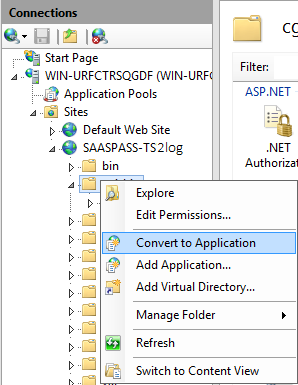
The cgi-bin virtual directory is already created under the SAASPASS-TS2log website, and you will have to convert it as an application:

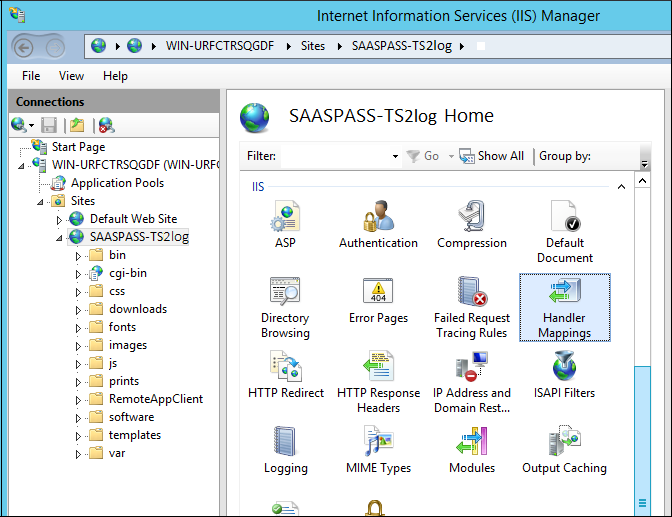
Then, double-click on the "Handler Mappings" icon for this folder on the right side of the Manager window:
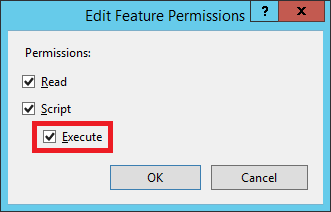
Now, right-click on CGI-exe and click on "Edit Feature Permissions":
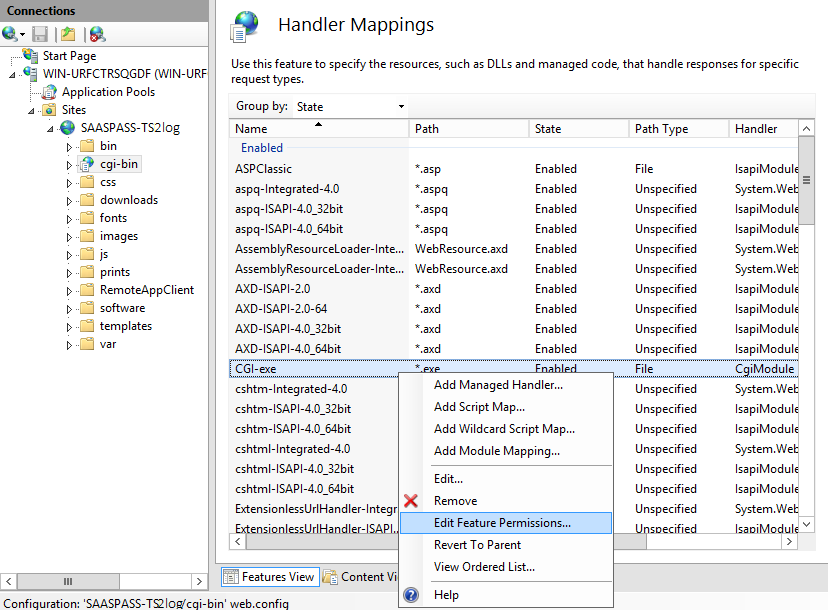
Check the "Execute" checkbox and click OK:
STEP 4
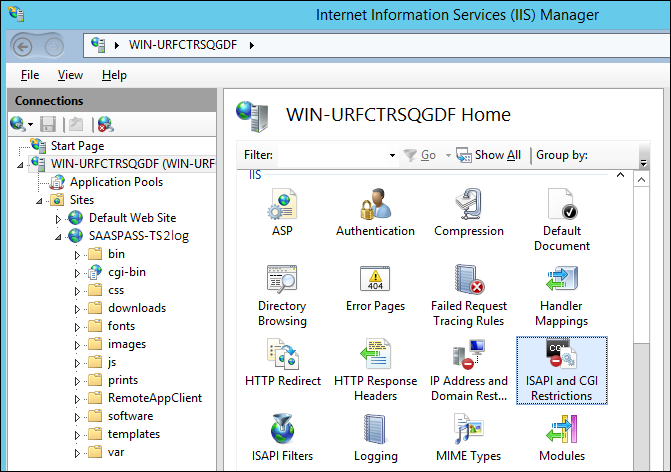
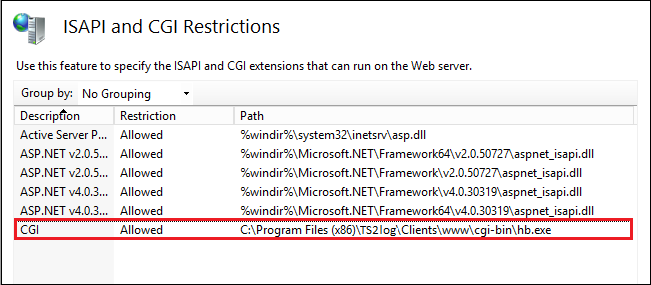
Configure CGI extension permission. Then, allow the CGI extension to run on the server.
Click on the "ISAPI and CGI Restrictions" icon. This can be found by clicking on the machine name in the menu on the left side of the window:
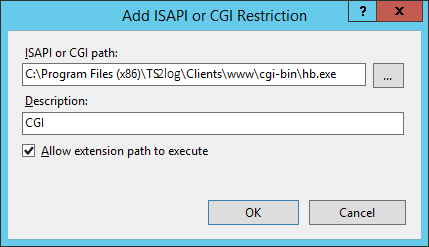
On the "ISAPI and CGI Restrictions" page, click "Add ISAPI or CGI Restriction" on the right side of the window. Now specify the full path to the "hb.exe" file hosted in the TS2log folder. Be sure to check the "Allow extension path to execute" option, as illustrated in the following screenshots:
STEP 5
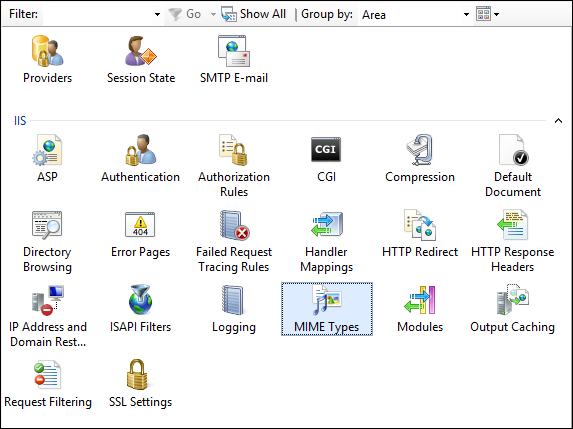
Add Mime types in IIS. Double-click on the Mime Types icon:
And verify that the “.” and “.dat” extensions appear with a text/plain MIME type:
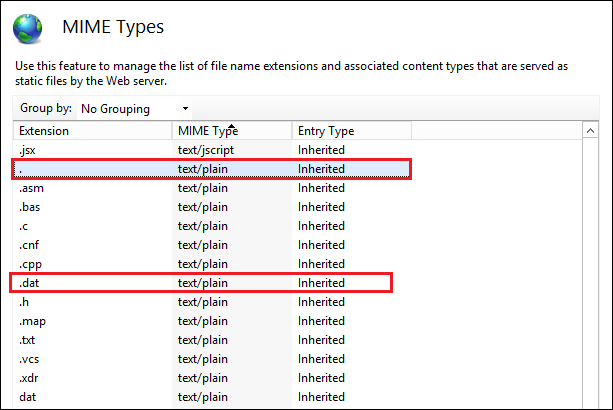
Otherwise, add them by opening a command prompt as an administrator and run the following commands:
%SystemRoot%\system32\inetsrv\appcmd set config /section:staticContent /+[fileExtension='.dat',mimeType='text/plain']
%SystemRoot%\system32\inetsrv\appcmd set config /section:staticContent /+[fileExtension='.',mimeType='text/plain']
Then restart IIS.
STEP 6
Once you set up the SAASPASS-TS2log plugin to run under IIS, now we need to change TS2log to use IIS Server instead of the built-in server:
- Open the TS2log Administrator Tool and click on the Manage Web Servers tile under the Web Tab.
- Select Use a different HTTP Web server
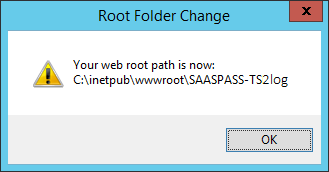
- Then, change the Web server root path to point to ISS SAASPASS-TS2log.
- Save the changes, the AdminTool will restart.

STEP 7
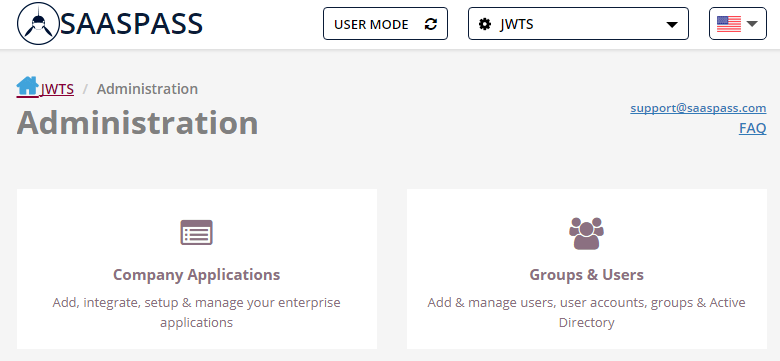
On the SAASPASS Portal, when switched to Company mode, you can add users on the Groups & Users tile and TS2log on the Company Applications tile:
STEP 8
Once everything is in place, open IIS Manager and go to Application Settings for the SAASPASS-TS2log site.
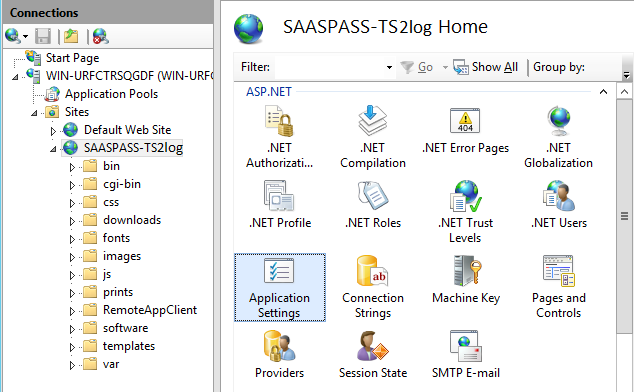
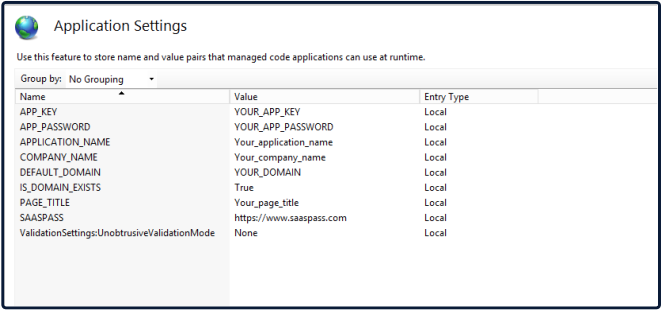
Enter the correct values for your application APP_KEY and APP_PASSWORD, which you can get from APP KEY & PASSWORD on the SAASPASS Admin Portal when you are managing your Application.
STEP 9
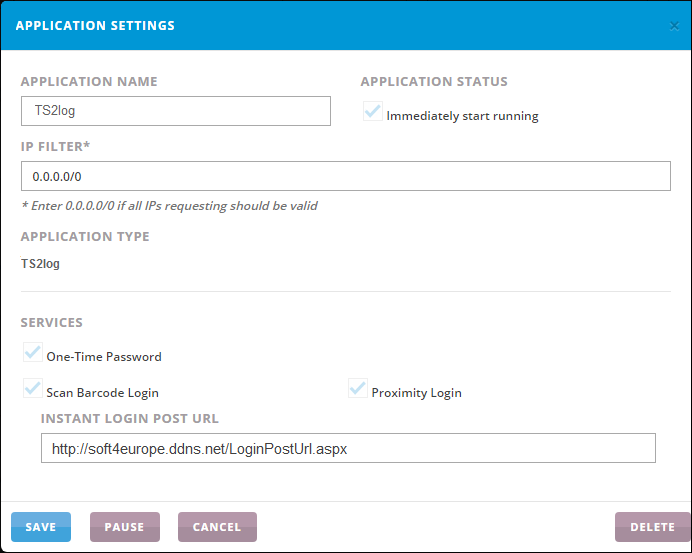
Under the TS2log application on the SAASPASS Admin Portal, open Application Settings and enter your desired IP Filter, as well as the TS2log URL, with your domain name, for example:
STEP 10
To add the RemoteApp or the Load Balancing options under TS2log to configure it please see this documentation page.
For SSL configuration instructions, please refer to this documentation.
STEP 11
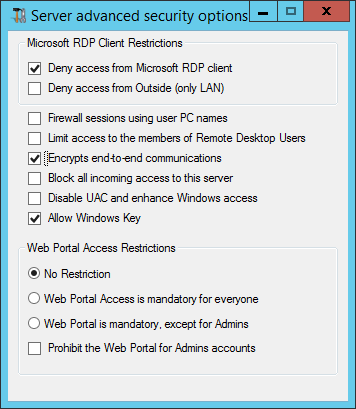
Open the TS2log AdminTool and navigate to Security -> Advanced Security. Enable 'Deny access from Microsoft RDP client' and 'Encrypts end-to-end communications'. Save the changes. Restart TS2log.
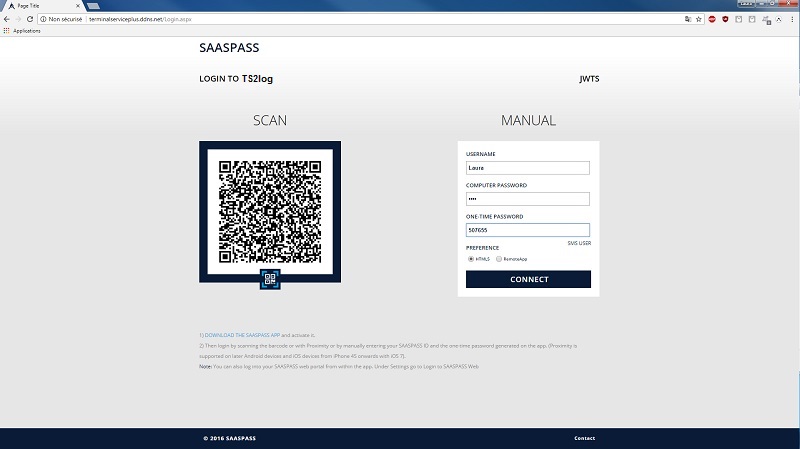
You are all set, now you can login to TS2log with SAASPASS: