
Load Balancing Feature
Pre-requisites
Using this feature, you will be able to manage a load balanced environment.
It means that the load of all your users will be distributed between your servers. The workload will be shared between all the servers of your farm.
Load Balancing enables to use an unlimited number of servers with load balancing and is available with the Gateway edition (one valid license per server). This very powerful and advanced capability is to be used when a large number of users/servers has to be deployed.
Warning : Load Balancing is not compatible with the Gateway Feature (allowing you to assign servers to users/groups, see this documentation for more information.)

Usually we recommend using one server for 50 concurrent users. For standard commercial application written in VB, C, C++, Delphi or Uniface you can go up to 100 concurrent users. For W7, we recommend to use the 64-bit version.
Generated Clients and Web Access
There are two ways to connect to a Load Balanced cluster:
- Using a Generated Client (executable program, created by the Portable Client Generator) tool
- Using a Web Gateway Portal Access (Web page in the browser, created by the Toolkit webmaster)
Load Balancing Main Window
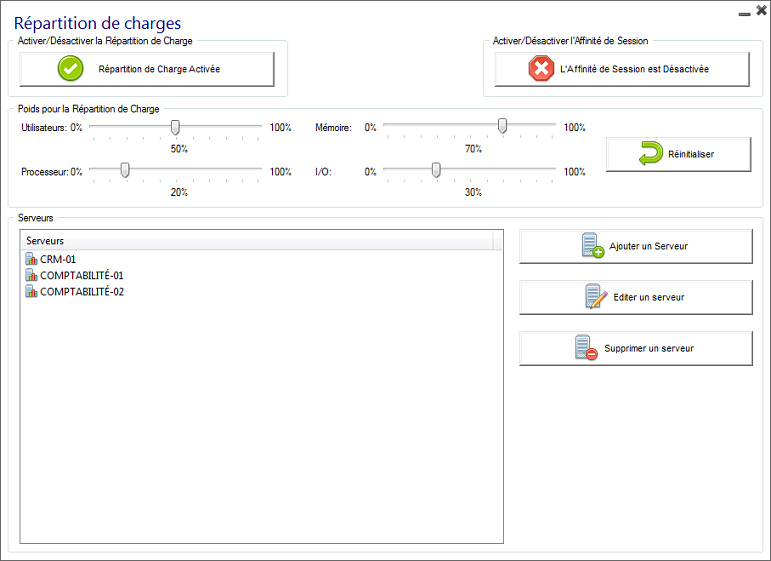
The main window displays a lot of data and allows you to configure Load Balancing.
![]()
It lists all the servers in your Load Balanced server farm, and allows you to add a new server (by clicking on the "Add a new Server" button) or displays an existing server (by clicking on it).
It also allows you to enable, disable and configure the Load Balancing (more on this below).
Click on the buttons in the picture below to access the corresponding information:
Enabling/Disabling Load Balancing
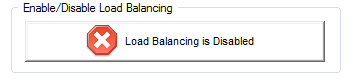
On top of the Load Balancing Portal/Gateway window, you will see a big button:
- This button displays the current state of the Load Balancing.
- If you click on it, it will enable or disable the Load Balancing depending on its current state.
Here is the button when the Load Balancing is disabled. A click on it will activate it and disable the Users/Servers Assignment.
Here is the button when the Load Balancing is enabled. A click on it will deactivate it and enable the Users/Servers Assignment.

How does Load Balancing choose a server?
When Load Balancing is enabled, the user will be sent to the less loaded server at the time of his connection.
Configuring the Computation of Servers' Loads
To determinate which is the less loaded server, the load of every server is computed using a weighted average between several performance indicators:
- number of connected users
- processor usage
- memory usage
- hard disk usage
You can modify the weight (importance) of these indicators by using the following sliders:

Using these sliders, you will be able to fine-tune the Load Balancing, and to optimize it to your own needs. For instance if your users launch a ERP type application with big memory requirements, it might be a good idea to increase the impact of the RAM in the load balancing computation using the "Memory" slider.
You can also reset these values by clicking on the "Back to Default Settings" button.
How is Server's Load computed?
The load of each server is computed in order to decide on which server the user must be sent.
For this computation, we use a weighted average between 4 hardware metrics.
The 4 sliders allow you to give more (or less) weight on each of these metrics, which are:
- Users : number of connected users
- CPU : percentage of non-idle processor time
- Memory : percentage of used memory
- I/O : percentage of non-idle disk time
For example, if you put the "Memory" slider on its right side and all the other sliders on their left side, the load of each server will be computed using almost only the percentage of used memory - and your users will be sent to the server having the most available memory.
- When a slider is completely on the left, the weight used in load computation will be 1.
- When a slider is completely on the right, the weight used in load computation will be 100.
Moreover, the load of a given server depends on the ratio [ used resources / total resources ] ; so if a server A is twice as powerful as a server B, twice more users should be sent to server A than to server B (all other things being equals).
Adding a new Server
To add a new server, simply click on the "Add a new Server" button. The following window will be displayed:

The "Display Name" is the title that will be shown to your users on the Web Access HTML page. It is supposed to be more user-friendly than a technical value (such as an IP address), for instance "US Server" or "Blue Zone".
The server address is reachable with http or https ports.
When using Load Balancing, the "RDP Port" will not be used. It is only used when connecting using a Generated Client. We advise you to keep the default setting ("Same as web").
You also have the possibility to enable or disable the server.
Modify an existing Server
To modify an existing server, simply click on the icon corresponding to the server you want to update. The following window will be displayed:

The progress bar shows the current load of the server. It also confirms you that the server is well configured and can be contacted by the Gateway.
Load Balancing using a Connection Client
You are not using the Reverse Proxy role of the Gateway (default case)
This is the default case if you just installed TS2log. In this case, if you want to generate a Connection Client to connect to a given Application server, then:
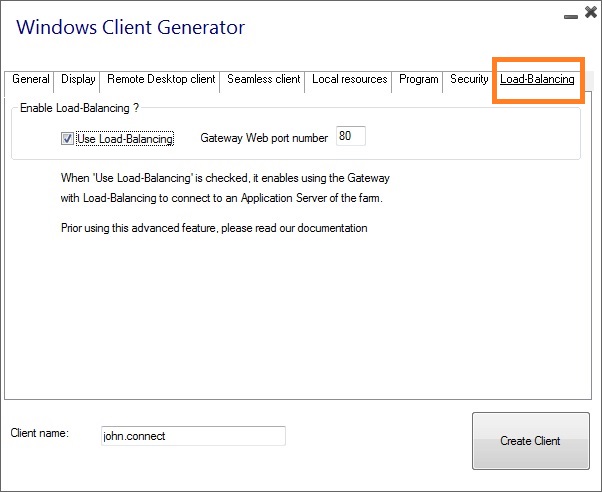
- Do not check the "Use Load-Balancing" checkbox on the Gateway Portal tab of the Connection Client Generator,
- Use the public IP address or hostname of your Application Server directly in the "Server" field.
However, if you want to generate a Connection Client to connect to the less loaded server and use Load Balancing, then:
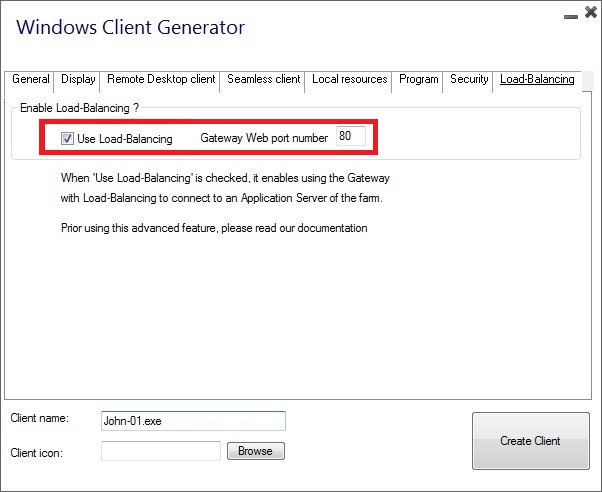
- Check the "Use Load-Balancing" checkbox on the Connection Client Generator,
- Use the public IP address or hostname of your Gateway Server directly in the "Server" field.
You are using the Reverse Proxy role of the Gateway ("/~~" in URL)
See this page.
Activating the Load Balancing for a Gateway Portal access
Activating Load Balancing is really easy. It only takes three steps:
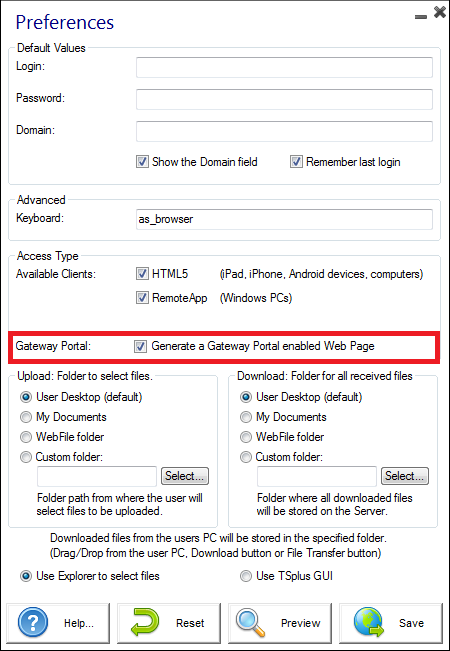
- Generate a Web Access page with the option "Generate a Gateway Portal enabled Web Page" checked, by clicking on the Web Portal Preferences tile of the Web tab:
- Enable Load Balancing by clicking on the "Enable/Disable Load Balancing" button (in the Load Balancing Manager, located on the Gateway tab of the AdminTool):
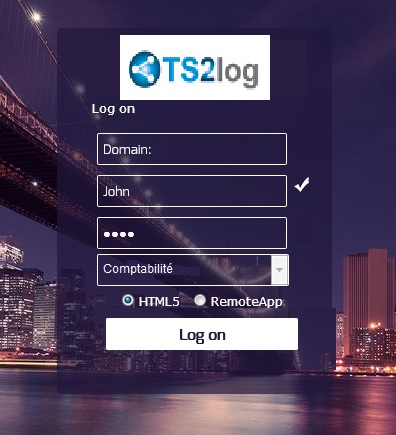
- Open a browser and navigate to the Web Access page you generated in step 1 (by default: http://localhost/index.html). After typing a login, you will see that the Web Access page chooses the less loaded server of your farm:
![]()
![]()
Activating the sticky session feature
Regardless of your connection method, you will always be able to activate the sticky session feature by clicking on the right button of the Load balancing window:

It will allow you to reconnect to a disconnected session instead of opening a new session on a another server.